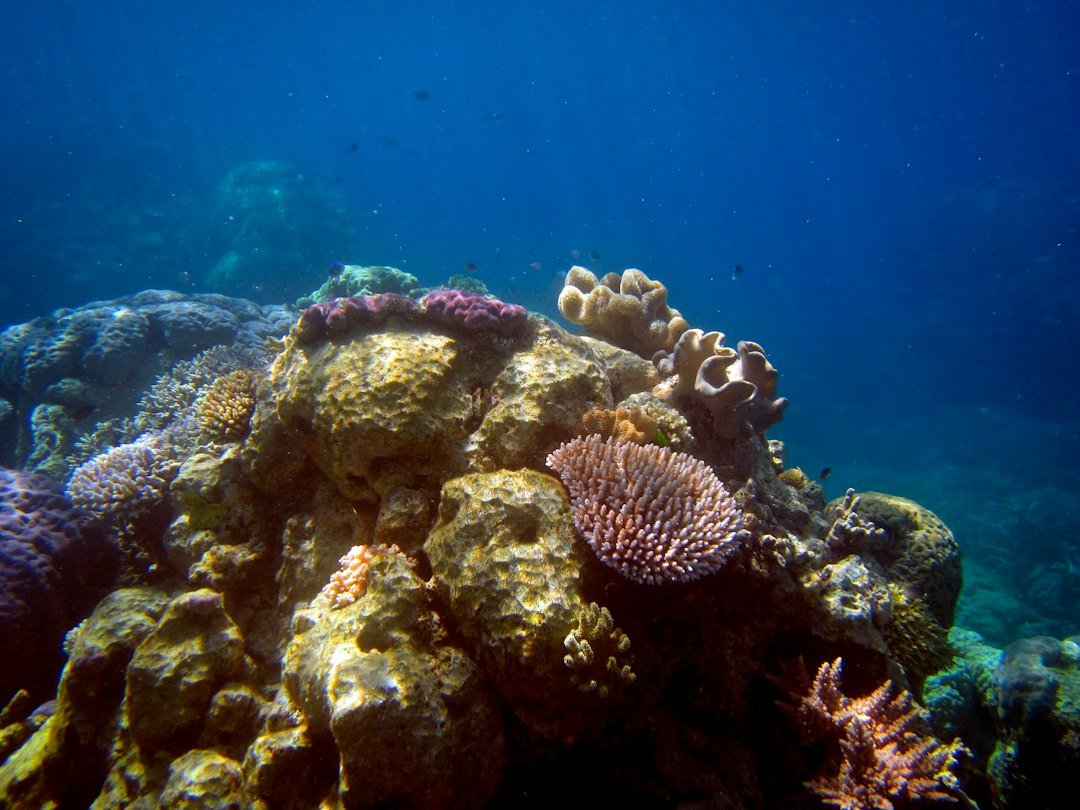
A common misconception is that learning how to photograph coral reefs underwater starts with buying a powerful camera. It does not. The best answer to how to photograph coral reefs underwater is to get close without touching anything, add controlled light, and keep your camera settings simple enough to repeat during a real dive. Water steals red and yellow light fast. A costly camera with poor buoyancy and no useful light still produces blue, hazy reef photos.
Start with dive skills. Reef photography asks you to hover near delicate coral while managing depth, current, air supply, buddy awareness, and camera controls. That is a lot. If you cannot hold position without finning or grabbing rock, leave the camera clipped off and practice buoyancy with a certified instructor first. No photograph is worth damaging coral or losing track of the dive.
How to photograph coral reefs underwater with color
Vibrant colors begin with distance. Get your lens as close to the subject as the reef and conditions safely allow, often within arm’s reach for a small coral head or a single sea fan detail, while keeping yourself far enough away to avoid contact. Close water has less suspended matter. It also holds more of the colors your strobe can restore.
Wide reef scenes need a different approach. A reef wall photographed from several metres away will usually look pale blue, even with a good camera and lights, because there is too much water between lens and subject. Get low, move close to a strong foreground coral, then frame the blue water behind it. Think foreground first. A large sponge, branching coral, or sea fan gives the image scale and depth.
Natural light can work well in shallow water when the sun is high and the visibility is clear. Stay roughly within the upper few metres if you want warm colors without strobes, and use a custom white balance or an underwater color preset if your camera allows it. Depth changes everything. Once you descend, white balance helps, but it cannot fully replace missing light.
For reliable coral color below shallow depths, a strobe is usually the most useful tool. A video light can help with close macro subjects and composition, but it often lacks enough output for a broad reef scene. Start modestly. One strobe can make a dramatic difference when it is close to the coral, aimed well, and used within its range.
Keep the strobe outside the lens axis. Pointing it straight ahead lights particles suspended in the water, which creates backscatter that looks like snow or dust across the frame. Put the strobe slightly above and to the side of the lens, then angle it inward so the brighter central beam reaches the coral rather than the water in front of it. Small adjustments matter.
With two strobes, place them wide enough that their beams overlap on the subject, not directly in front of the port. For a wide-angle reef image, I would begin with both strobes slightly behind the camera plane, angled outward, then bring them forward only until the near coral is evenly lit. Check the corners. Hot spots and bright sand patches can pull attention away from the reef.
| Situation | Useful starting approach | What to watch for |
|---|---|---|
| Shallow reef in bright sun | Ambient light, fast shutter, low ISO, custom white balance if available | Blown highlights on sand or the surface |
| Close coral portrait | Single strobe from the side, low power, lens close to subject | Backscatter and overly bright pale coral |
| Wide reef scene | Wide lens, close foreground, two strobes angled outward | Dark corners, weak foreground color, distant haze |
| Fish over a coral garden | Expose for blue water, use strobes to light nearby coral | Slow shutter blur and fish outside strobe range |
Manual exposure gives you the most predictable results underwater because it separates the blue background from the strobe-lit foreground. Use shutter speed to control ambient brightness in the water behind the reef. Use aperture, ISO, strobe power, and strobe distance to control the coral. This separation is the key.
A practical starting point for a wide reef photo is a moderately fast shutter speed, a middle-to-small aperture, low ISO, and low-to-medium strobe power. For example, try 1/125 second, f/8, ISO 100 or 200, then take a test frame. These are starting-point examples only, so adjust them for your camera, housing, flash sync limit, depth, available light, and conditions. If the water looks too bright, raise shutter speed within your camera’s flash sync limit. If the coral is too dark, move closer before turning the strobes up.
Moving closer is often better than adding power. Higher strobe power can illuminate more particles and lengthen recycle time between shots. It also makes pale coral easy to overexpose. Watch the histogram or highlight warning after a test shot if your camera provides it. White sand and pale coral should retain visible texture.
For compact cameras, the same principles apply even though controls may be simpler. Use the widest useful angle, get close, select a low ISO, and add an external strobe if the system supports one. Built-in flashes are limited underwater. Their light sits too close to the lens, so backscatter is common unless the subject is extremely close and the water is very clear.
Build the shot before pressing the shutter
Good composition gives color somewhere to go. Before you raise the camera, decide what the photograph is about: a coral formation, a turtle passing a reef, the curve of a wall, or a single textured detail. Pick one subject. A frame packed with equally bright coral can feel busy even when the exposure is technically correct.
Get low when conditions allow. Shooting slightly upward places coral against open water, which makes the subject read clearly and can include sun rays or a distant diver for scale. Keep the horizon level if there is one. A tilted reef slope often looks accidental unless the angle is clearly part of the composition.
Look for leading shapes. A line of plate coral, a ridge, or the edge of a sand channel can pull the eye toward your main subject. Leave some clear blue water where a fish may swim into the frame. Patience helps. Chasing fish around coral usually creates a tail-end composition and poor body position near the reef.
Use the reef’s natural structure. Branching coral can frame a fish, while a sea fan can add an obvious foreground layer if you shoot through it carefully. Avoid jamming the lens into coral for a dramatic angle. Maintain enough distance that surge, exhaled bubbles, or a small buoyancy correction cannot push you into the reef.
Set up the camera before the dive
Set your controls on the boat or shore, where you can think clearly. Charge batteries, format cards after confirming old images are backed up, check housing seals, and inspect the O-ring according to the housing maker’s instructions. One hair or grain of sand can cause a leak. Keep the camera out of direct sun once assembled if heat is an issue at your site.
Do a quick function check in shallow water. Take one frame toward open water, one close frame with flash, and one frame at your likely working distance. Confirm that both strobes fire. A loose fiber-optic cable or a blocked flash window can ruin a whole dive without any warning on the surface.
- Choose a lens and subject plan before entering the water. Wide angle suits reef scenes; a macro setup suits tiny coral details.
- Set a conservative baseline exposure, then take a test image near the depth where you expect to work.
- Adjust the water background first with shutter speed, keeping within your flash sync limit.
- Adjust coral brightness by moving closer, changing strobe aim, or changing strobe power.
- Review for backscatter, clipped highlights, and messy edges before moving to the next subject.
This sequence prevents random setting changes. It also means you learn what each adjustment actually did. If visibility is poor, shorten the lens-to-subject distance further and simplify the scene. A tight coral detail often works better than a wide view full of haze.
Use color carefully in post-processing
Editing should restore the scene you saw, not turn every reef into neon. Begin with white balance, exposure, and contrast. Then make selective adjustments to reds, oranges, and yellows only if they still look muted after the basic correction. Go slowly. Excess saturation can make coral look plastic and can hide the natural variation that gives a reef texture.
Backscatter is easier to prevent than remove. You can clean a few obvious particles in editing, but a frame full of white specks usually needs a tighter crop or a different image choice. Inspect the image at a useful zoom level. Tiny particles can become very obvious in a large print or on a high-resolution screen.
Be careful with clarity, sharpening, and dehaze controls. A little can bring out coral texture, while too much creates hard edges and strange halos against blue water. Compare your edit to the original often. If the water turns purple or the coral glows unrealistically, pull the adjustment back.
Respect the reef and the dive plan
Reef photography is never a reason to touch coral, rest a hand on rock, hold onto a sea fan, or block another diver’s exit route. Corals and other reef life can be fragile even when they look solid. Keep fins well away. If surge or current makes the shot unsafe, skip it and move to a protected area with your buddy.
Watch your depth, no-decompression limits, gas supply, and buddy before checking the screen. Cameras narrow attention fast. Agree on the dive plan and signals before descending, especially when one diver plans to spend time framing photographs. A compact camera can be distracting too.
The strongest underwater coral photos usually come after you stop trying to capture the entire reef in one frame. Choose a clean subject, get close, light it deliberately, and leave yourself enough time to hold position. Repeat that process across several dives. Your colors will improve because your decisions improve, not because the reef suddenly became easier to photograph.
Related posts
This article is for general informational purposes only and is not dive training or medical advice. Always train with a certified instructor and consult a doctor before diving if you have any health concerns. Gear specs, pricing, site conditions, and operator schedules change, so verify current details directly with the manufacturer or dive operator.