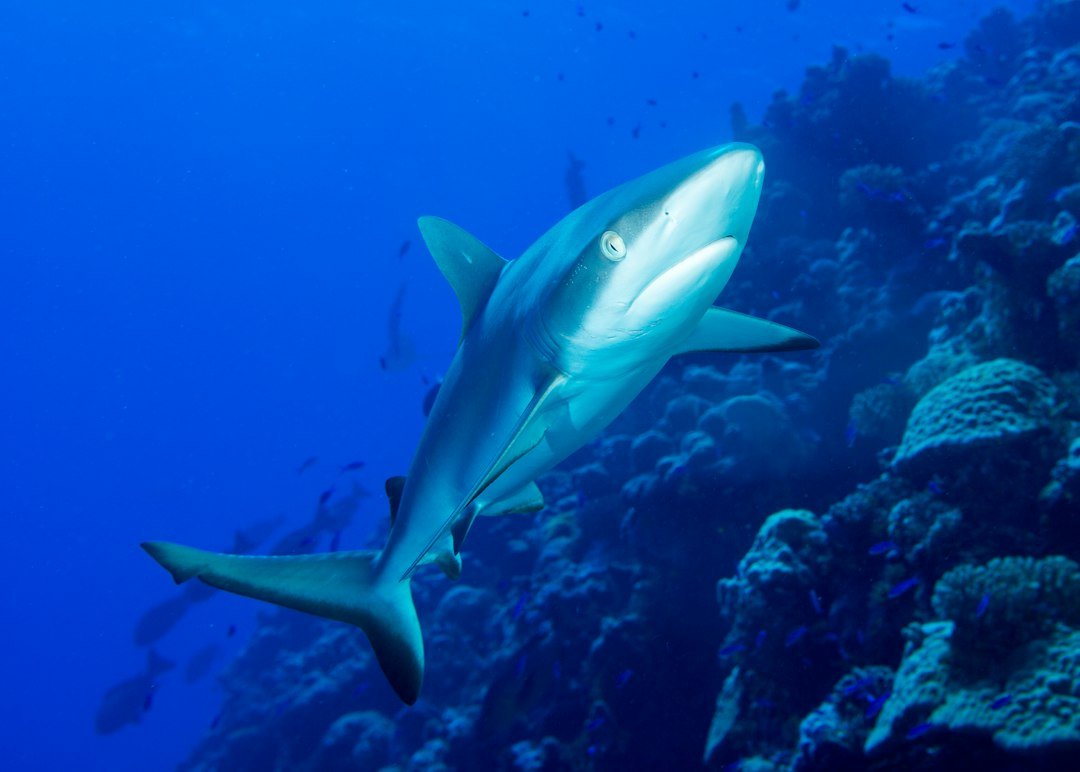
A common misconception about how to photograph sharks underwater safely is that a better image requires getting as close as possible. It does not. The strongest shark photos usually come from good positioning, a wide view, and the patience to let the shark choose its distance. Your first job is to dive safely. A shark is a wild animal, and local conditions, species behavior, current, and the dive operator’s rules should set the limits for every encounter.
Plan the dive before the camera comes out
Decide what kind of image you want before entering the water: a full-body side profile, a shark against the surface, or a wider reef scene with the animal moving through it. Keep it simple. A clear plan stops you from chasing every pass, which is where buoyancy, buddy awareness, and animal etiquette often fall apart. On a guided shark dive, listen closely to the briefing and use the guide’s stated entry, descent, grouping, and exit procedures even when the sharks appear calm.
Pick an operator with clear wildlife rules
Choose an operator that explains how divers should behave around the animals and what happens if conditions change. Ask directly. Useful questions include whether the dive is stationary or drifting, whether bait is used, how close divers normally get, what species are expected, and where photographers should position themselves. A responsible briefing should tell you where to keep your hands, fins, and camera, plus how the group handles a shark that approaches more closely than expected.
Some shark encounters take place in strong current or open water, while others happen over sand or along a reef wall. Those are very different dives. Do not book a demanding shark dive as your first attempt at using a camera underwater if you still struggle to hold depth, make a controlled ascent, or manage a safety stop without focusing hard on your gauges.
Set your camera on the boat
Do as much setup as possible before the entry. Check the housing seal for hair, sand, and moisture, attach a secure lanyard only if it will not dangle around your equipment, and confirm that your controls work after the housing is closed. Then stop opening it. A flooded camera distracts a diver, but repeatedly opening a sealed housing on a wet boat deck creates more risk than it solves.
For beginners, use a camera setup you can operate without looking at every button. Practice first. Set your focus mode, shutter speed, aperture, ISO, and flash settings before you descend, then make small changes only when the dive is stable. If you use strobes, keep both arms tucked close until you are settled so they do not strike coral, another diver, or your own mask during entry.
How to photograph sharks underwater safely
Stay low in the water column when the site allows it, keep your body horizontal, and leave the shark a clear route past you. Give it room. The best position is often slightly ahead of the direction you expect the shark to travel, rather than directly in its path or behind it. This lets the animal pass naturally while you frame the eye, gills, body line, and surrounding water without a pursuit.
Read distance and body language
There is no universal safe distance because species and site rules differ, but your operator’s limit is the one to follow. Maintain a buffer. Never touch a shark, grab its fin, attempt to redirect it, block its route, or place yourself between it and an exit route. Avoid dropping onto an animal from above, which can look threatening and may also put your fins too close to a reef or the shark’s back.
Watch for changes in the animal’s movement rather than treating every shark as predictable. A shark that turns sharply, speeds up, changes direction repeatedly, or makes a close approach deserves your full attention, not a frantic attempt to get one more frame. Stay composed, keep your camera between you and the animal only if that feels natural and does not interfere with your buoyancy, and follow your guide’s signal.
- Stop first. Establish neutral buoyancy and check where your buddy is.
- Choose one direction. Face the expected approach without cutting off the shark’s path.
- Frame wide. Leave space around the shark so you do not need to rush closer.
- Take a short burst. Capture a few frames, then look away from the viewfinder and reassess the scene.
- End the attempt early. If current, depth, air supply, or group position becomes a problem, put the camera down and manage the dive.
Protect your buoyancy and your buddy
Shark photography gets difficult when the viewfinder absorbs all your attention. That is common. Before each pass, glance at your depth, check your distance from the bottom or reef, and confirm your buddy is within the plan your team agreed. If you need to use both hands to adjust the camera, do it only when you are stable and clear of the reef.
Keep your fins quiet and controlled. Fast kicking can stir sand, ruin visibility, and make you drift into another diver’s frame or space. If you cannot hold your position, abandon the photo. A missed image costs nothing, while poor control can damage a site or create a difficult situation for the group.
Use a simple shark camera setup
A wide-angle lens is usually the practical choice because sharks are large, water reduces contrast, and wide coverage lets you include the animal without closing distance. Start wide. A fisheye lens works well when the shark comes close and the water is clear, while a rectilinear wide lens can keep straighter lines if you also want reef structure in the frame.
| Situation | Useful starting approach | What to watch |
|---|---|---|
| Clear water, shark near the surface | Wide lens, ambient light, faster shutter speed | Bright surface can darken the shark |
| Reef pass at moderate depth | Wide lens with restrained strobe output | Backscatter and strobe arms near coral |
| Low light or deeper water | Wide lens, higher ISO, careful exposure check | Noise, blur, and rapid air consumption |
| Shark remains far away | Photograph the scene rather than chasing | Do not sacrifice distance for a tight frame |
For a moving shark, a shutter speed around 1/160 to 1/250 second is a reasonable place to begin with many camera systems, provided your available light supports it. Check your results. If the tail is soft from motion blur, increase shutter speed if possible; if the image is too dark, consider modest ISO adjustment before you move closer or add excessive strobe power.
Focus on the eye and keep the whole shark
Set continuous autofocus if your camera tracks reliably underwater, and use a focus area that you can place near the shark’s head or eye. The eye matters. Aim for a side angle or a slight head-on angle only when the shark is already approaching naturally, because a full front view can make composition difficult and may encourage you to hold position where the animal needs to pass.
Do not crop the fins by accident. Leave extra space in the frame, especially ahead of the shark’s direction of travel, and shoot a brief sequence rather than holding the shutter for the entire pass. This conserves battery power and gives you time to look around between shots.
Tips for beginners underwater
Begin with ambient-light images on an easy reef or open-water shark dive before adding powerful strobes, video lights, or a large tray. Less gear helps. A compact camera or small mirrorless setup can produce a satisfying first shark image when the diver behind it has solid trim and situational awareness. Fancy equipment does not fix poor positioning.
Try a simple exposure routine. Point the camera toward the water where the shark will appear, take a test frame, and check whether the background is too bright or too dark. Then wait. When the shark enters the scene, concentrate on your depth and framing rather than rebuilding every setting in the middle of the encounter.
Use light with restraint. Strobes can add color to a nearby shark, but they also illuminate suspended particles and can produce a harsh look if they are aimed straight ahead. Angle them slightly outward, keep power low at first, and review the result when you have a calm moment. Follow the operator’s rules if they restrict lights or flashes.
FAQ
Is it safe to photograph sharks while scuba diving?
It can be managed responsibly when the dive matches your experience, you follow a qualified local guide, and you maintain control of your buoyancy and awareness. Conditions matter. No camera technique makes a wildlife encounter risk-free, so skip the dive or stop taking photos if you are uncomfortable, overloaded, or outside the operator’s stated requirements.
Should beginners use a strobe for shark photos?
Beginners can start without one. Ambient light is simpler, reduces task loading, and avoids backscatter while you learn how sharks move through the scene. Add strobes after you can hold stable position and operate the camera without losing track of your buddy, depth, and surroundings.
How close should I get to a shark for a photo?
Close enough is whatever distance the shark voluntarily chooses while you remain within the guide’s rules and retain a clear route for the animal. Let it come to you. A wide lens and patient positioning are safer choices than swimming after a shark to fill the frame.
What should I do if a shark comes closer than expected?
Stay calm, stop finning hard, keep your body position stable, and make room rather than backing into reef or other divers. Watch the guide. Put photography second, follow the established group procedure, and end the shot if you cannot maintain awareness or comfortable spacing.
Related posts
This article is for general informational purposes only and is not dive training or medical advice. Always train with a certified instructor and consult a doctor before diving if you have any health concerns. Gear specs, pricing, site conditions, and operator schedules change, so verify current details directly with the manufacturer or dive operator.
Disclosure: This post may contain affiliate links. If you click through and make a purchase, we may earn a commission at no extra cost to you. We only recommend gear we’ve researched or genuinely believe in.