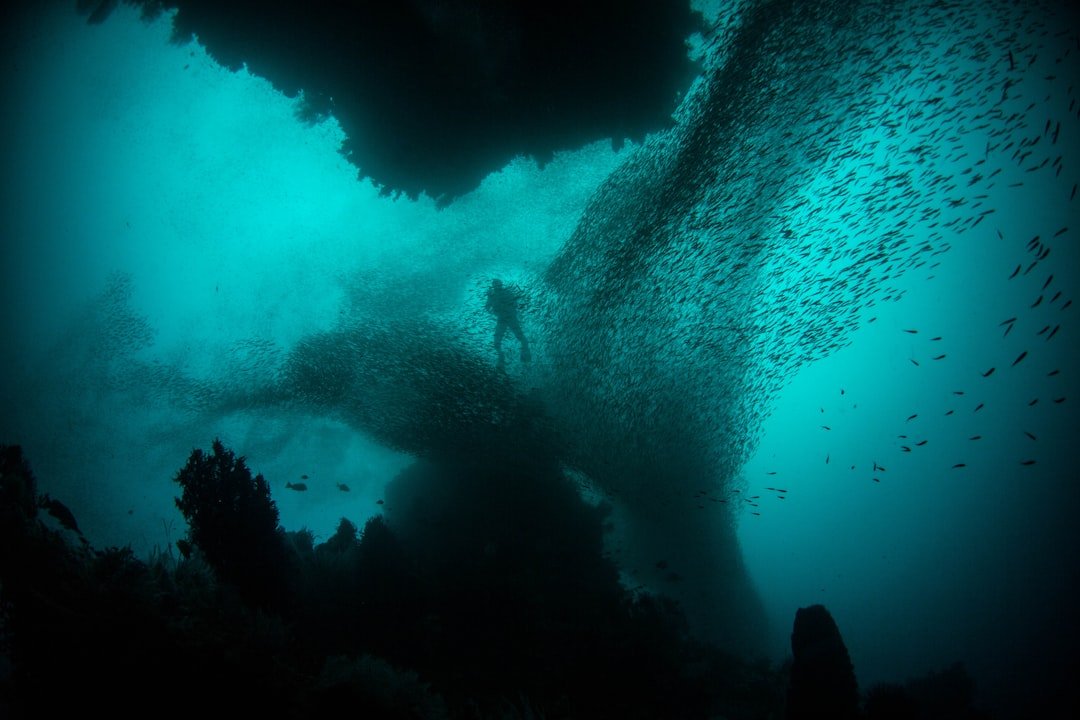
Underwater photography lighting techniques for beginners start with getting close, exposing the background first, and adding only enough artificial light to restore color on your subject. Keep it simple. The most useful underwater photography lighting techniques are based on light distance and angle, not maximum strobe power or an expensive camera rig.
Why water changes your light
Water absorbs light quickly, with reds disappearing first and warm colors fading as depth and subject distance increase. Blue takes over. Even in shallow, clear water, a reef fish photographed several feet away can look flat because the light has traveled through too much water before it reaches the camera. Your strobe light makes a round trip too, traveling to the fish and then reflecting back through the water to the lens, so reducing that distance is usually more valuable than adding power.
Particles create a second problem. Sand, plankton, and silt reflect strobe light back toward the lens, which creates the pale dots called backscatter. It is frustrating. Light aimed directly along the lens axis hits those particles head-on, while light placed out to the side is less likely to send those reflections straight into your image.
Start with ambient light
Before turning on a strobe, decide what you want the available light to do in the frame. Ambient light controls the blue or green water background. Your shutter speed, aperture, and ISO have different jobs, although they overlap enough that you should adjust one variable at a time while learning.
- Shutter speed mainly changes the brightness of ambient light and helps freeze camera movement. Start around 1/125 second if your camera and subject allow it. Faster is often cleaner.
- Aperture affects both ambient light and strobe exposure, plus depth of field. An aperture around f/8 is a practical starting point for many compact and interchangeable-lens setups. Small subjects need depth.
- ISO raises the recorded brightness of both light sources, but it can add noise and reduce editing flexibility. Keep it low when conditions permit. Clean files are easier.
Point the camera toward open water, take a test frame without flash, and adjust until the background has the tone you want. Do this first. A darker blue background often gives a subject more separation, while a brighter background can suit wide reef scenes where you want a lighter, more open look.
Underwater photography lighting techniques for beginners
Place a single strobe off to the side
One strobe is enough to learn strong fundamentals. Put it on a tray and arm system, extend it slightly beyond the housing, then angle the strobe so the edge of its beam reaches the subject instead of aiming the center directly at it. Start with the strobe above and outside the lens, roughly at a 45-degree angle. Small changes matter.
This position helps keep the brightest beam away from water directly in front of the port, reducing backscatter while adding shape to scales, coral texture, or a diver’s face. If the near side of your subject is too bright, lower the power before moving closer with the strobe. If the far side disappears, move the strobe a little toward the camera axis or use a wider beam.
Keep the light close to the subject
Light falls off rapidly with distance underwater. Stay close. For a fish portrait, get as near as your buoyancy, subject behavior, and site rules allow, then place the strobe close enough that it lights the fish rather than the water between you and it. This is why a modest strobe close to a subject can produce richer results than a high-output unit mounted far out on long arms.
Do not chase wildlife into a corner or touch the reef to stabilize yourself. A good image is never worth damage. Practice neutral buoyancy and trim with a certified instructor if camera task loading makes it difficult to hold position safely.
Use strobe power sparingly
Start at quarter power or lower for close macro subjects and increase only when the image is underexposed. Low power has benefits. It shortens recycle time, helps you shoot another frame when the fish turns toward you, and can reduce harsh hotspots on pale subjects such as anemones or sand.
For larger scenes, you may need more output, especially if you use a small aperture to hold both coral and a diver in focus. Still, check the image after a shot rather than assuming full power is correct. Pale areas should retain texture, and a bright white fin should not become a blank patch.
Use a video light differently
Continuous video lights are excellent for close video and can help your camera focus in dark water, caves, or under ledges when local rules and conditions allow. They are not always strong enough for still photos in daylight. A video light has much less peak output than a strobe, so it works best close to small subjects, at night, or in low ambient light.
Watch your subject’s response. Some animals dislike bright continuous light, particularly at night. Avoid prolonged illumination, avoid shining lights into an animal’s eyes, and follow local operator guidance for wildlife encounters.
Build the exposure in a repeatable order
A repeatable sequence prevents random adjustments underwater. First set the camera for the background with your flash or strobes off. Next, add artificial light for the subject. Then review the histogram, highlight warning, and image at useful magnification if your camera provides those tools.
If the background is too bright, increase shutter speed within your camera’s flash-sync limit, close the aperture, or lower ISO. If only the subject is too bright, reduce strobe power, move the strobe farther away, or angle it more across the subject. Separate the problems. This method makes troubleshooting faster because ambient and strobe exposure are controlled by related but different adjustments.
Many cameras have a maximum shutter speed that synchronizes with a strobe, and the exact limit varies by model and flash system. Check the manual. Going beyond that limit can cause a dark band or partial exposure, unless your specific equipment supports a compatible high-speed method.
Choose gear that supports learning
A compact camera with a single strobe can teach the same basic light placement skills as a larger interchangeable-lens setup. The housing matters. You need controls that are easy to reach with gloves, a reliable tray and handle system, and arms or clamps that stay fixed when you reposition the light.
- A strobe with manual power control gives clear feedback while you learn. You make a change and see the result.
- A wide, even beam is helpful for fish portraits and reef scenes. Diffusers can soften light, though they also reduce output.
- A focus light can help autofocus on macro subjects. Turn it down or off when it disturbs a subject or appears in the frame.
- A lanyard or secure attachment prevents a dropped light from becoming lost gear. Check clips before every entry.
Prices vary by region and support can matter as much as output. Battery type, charger availability on a trip, replacement O-rings, and local repair options are practical considerations that can outweigh a small specification difference.
Work with the subject and the water
Clear water makes lighting easier, but positioning still matters on every dive. Shoot slightly upward when possible. This puts water behind the subject instead of busy sand, often gives a more natural fish portrait, and lets your strobe light the animal without blasting a pale bottom that can reflect light back into the lens.
For reef scenes, use sunlight as part of the composition rather than trying to overpower it. Place the sun behind or outside the frame, expose carefully to protect bright areas, and use strobes only to fill the foreground coral or diver. Wide scenes are difficult. One strobe may leave uneven light at the edges, which is normal and often less distracting than an overlit foreground.
At night, move slowly and keep your beam controlled. Silt rises easily. A narrow focus light or a carefully aimed primary light helps you find subjects without flooding the entire area with light and particles.
Common mistakes to fix underwater
- Backscatter fills the frame. Move closer, pull strobes farther out to the sides, and angle them outward. Do not simply raise power.
- The subject has a white hotspot. Lower strobe output or feather the beam so its edge lights the subject. Check shiny fish and pale sand first.
- The photo is blue and flat. Get closer and add light to the subject. White balance alone cannot restore color that never reached the sensor.
- The background is black. Slow the shutter speed within safe handling limits, open the aperture, or raise ISO modestly. Keep an eye on blur.
- The camera misses focus. Aim at a high-contrast detail such as an eye, use an appropriate focus mode, and stabilize your body without contacting the bottom. Good trim helps.
Practice on a simple dive plan
Pick one cooperative subject on an easy, familiar dive and use one strobe for the whole dive. Avoid changing everything at once. Photograph the same subject with the light close, then farther away, then angled outward, while keeping the camera settings as consistent as conditions allow.
Review the images after the dive and look for patterns instead of judging only your favorite frame. Ask two questions. Where is the water brightest, and where do particles appear? Those answers tell you whether the next adjustment should be strobe angle, strobe distance, or camera exposure.
Frequently asked questions
Do beginners need two strobes?
No. One strobe teaches placement, power control, and backscatter management without adding another arm and cable to manage. Start there. Two strobes are useful for wider scenes because they can light a larger foreground more evenly, but they also increase cost, drag, and task loading.
Should I use automatic strobe exposure?
Automatic or TTL exposure can be useful when subject distance changes quickly, such as fish moving through sunlit water. Manual power is often easier for learning. It gives a direct relationship between your adjustment and the image, especially when you hold a steady distance to a macro subject.
How close should I get for underwater photos?
Get as close as you can without stressing wildlife, damaging the environment, or losing safe buoyancy control. Closer is usually better. A practical goal is to fill more of the frame with the subject rather than cropping heavily later, because less water between lens and subject means more color, contrast, and detail.
Can I use a torch instead of a strobe?
A torch or video light can work for close-up photos in dim water, at night, or with cameras that have strong low-light performance. Daylight still photography is harder. A strobe freezes motion more effectively and usually has enough output to add color without forcing a high ISO or slow shutter speed.
Related posts
This article is for general informational purposes only and is not dive training or medical advice. Always train with a certified instructor and consult a doctor before diving if you have any health concerns. Gear specs, pricing, site conditions, and operator schedules change, so verify current details directly with the manufacturer or dive operator.
Disclosure: This post may contain affiliate links. If you click through and make a purchase, we may earn a commission at no extra cost to you. We only recommend gear we’ve researched or genuinely believe in.