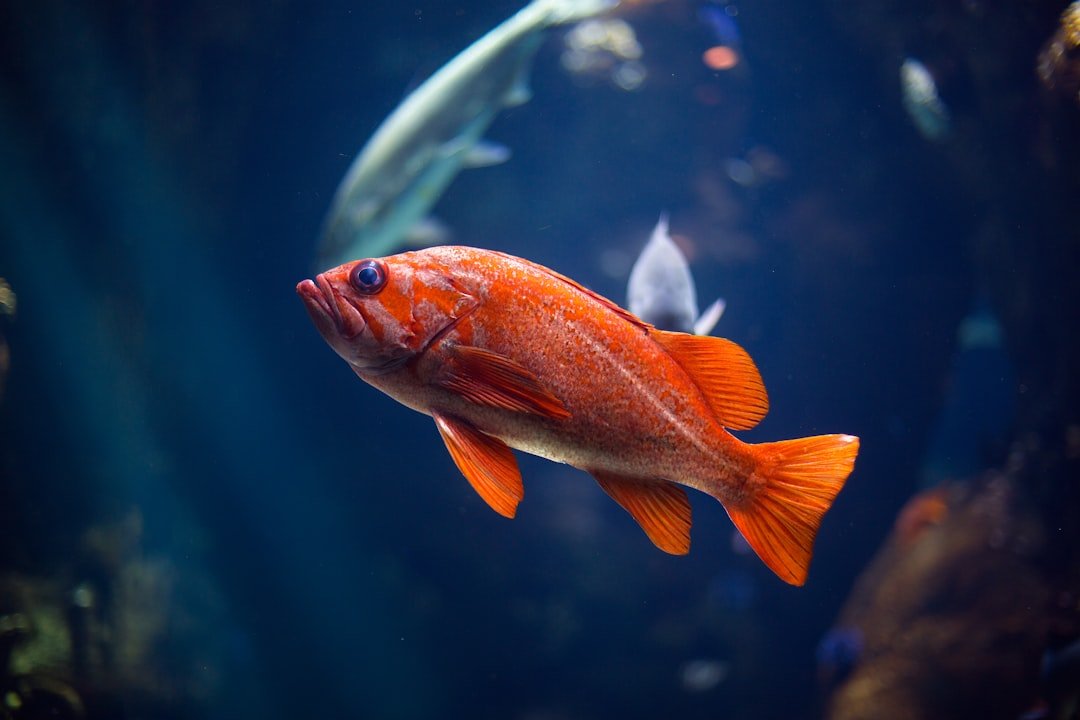
Get neutrally buoyant before you touch the shutter. That is the fastest way to photograph fish underwater with better focus, cleaner framing, and less stress for the animal, because a stable diver can wait for the fish to turn while an unstable diver usually chases it away. Start close. When learning how to photograph fish underwater, aim for one calm subject rather than a wide reef scene full of tiny fish.
How to photograph fish underwater with control
Stop finning near your subject. Hover, breathe slowly, and use a reef hook only where local rules allow it and only on a suitable dead-rock or rubble area, never on living coral. Good trim matters. If your knees drop or your camera pulls you forward, fix your weighting and body position before the next dive.
Fish notice rushed movement. Approach from the side or at a shallow angle, then pause outside the fish’s comfort distance and let it settle into its normal behavior. Many reef fish tolerate a patient diver better than one who swims directly at them with a large camera housing.
Keep your camera at eye level. A photo taken slightly upward often puts open water behind the fish and gives it a stronger shape, while a downward angle usually puts bright sand, coral clutter, or a dark bottom behind it. Get low carefully. Never rest on coral or stir up the seabed for a shot.
Watch the fish before shooting. Look for an open eye, a clean profile, fins spread naturally, and a head turned a little toward the lens; that small turn gives the image more connection than a flat side-on record shot. Wait for the moment. A fish that is feeding, cleaning, or sheltering may give you several chances.
Choose a simple beginner camera setup
Use the camera you can operate without looking at every button. A compact camera in a housing, an action camera, and a mirrorless camera can all produce enjoyable fish images, but the best choice depends on budget, desired image quality, and how much bulk you want to manage underwater. Start simple. Complex controls are hard to learn when you are also managing depth, gas, current, and buoyancy.
A close-focusing compact with a tray and one strobe is a practical first serious setup for many divers. The tray gives two stable handholds, and the strobe restores color that disappears as depth increases. Natural light works too. It is most forgiving in shallow, clear water with the sun behind you.
Wide-angle lenses suit large fish, reef scenes, and subjects you can approach very closely. Macro lenses suit small fish and portraits where you want the eye and facial detail to fill the frame. Lens choice changes your distance. Do not buy a macro lens expecting to photograph a shy shark across the reef.
Check every housing before entry. Inspect the main O-ring for hair, sand, or twists, use only the lubricant recommended by the housing maker, and rinse the closed housing in fresh water after diving. Floods happen fast. Verify model-specific depth ratings, ports, and maintenance instructions with the manufacturer before a trip.
Set focus and exposure for fish
Prioritize shutter speed. Fish move their fins, shift in surge, and often turn just as you press the shutter, so a faster shutter speed is usually more useful than a very low ISO when you want a sharp image. Start around 1/125 second for a cooperative fish. Move toward 1/250 second or faster for active subjects if your camera and lighting allow it.
Use continuous autofocus if your camera tracks reliably underwater. Place the focus point on the nearest eye, especially for fish portraits, because a sharp eye makes slight softness in the tail or fins look intentional while a soft eye makes the whole image feel missed. Focus on the eye. Recompose only a little after focus lock if your system does not track well.
For ambient-light photos, set white balance according to your camera’s underwater option or capture RAW files so you have more room to adjust color later. Auto white balance can work in very shallow water. It often struggles deeper. A red filter may help video or available-light photos in blue water, but it reduces light and is not normally used with strobes.
Manual exposure gives consistent results once you understand it. Begin with a shutter speed that stops subject movement, choose an aperture that gives enough depth of field, then raise ISO only as much as needed for the background exposure. Check the histogram when possible. The rear screen can look bright underwater even when highlights are clipped.
Use strobes without backscatter
Water absorbs warm colors quickly. A strobe adds light close to the fish, which can bring back reds and yellows that ambient light loses, but poor strobe placement lights suspended particles between the lens and subject. That is backscatter. It looks like white snow in the image.
Keep the strobe arms wide and slightly behind the front of the lens port. Point the strobes outward so the edge of each beam reaches the fish instead of aiming both lights straight down the lens axis. Start with low power. Increase power only when the fish is underexposed after you have moved as close as conditions safely allow.
Distance is the real fix. Every extra foot of water reduces contrast and adds more particles between your lens and the fish, so swimming closer usually improves color and sharpness more than turning up strobe power. Get close carefully. Do not corner a fish in a crevice or block its route away.
For a single strobe, place it above and to one side for a more natural shadow pattern. For fish facing the camera, move the strobe farther out to reduce hot spots on reflective scales. Review the first few frames. A small arm adjustment can change the entire result.
Compose fish photos that feel intentional
Leave space in front of the fish. Fish look better when they appear to have somewhere to swim, so place the head toward one side of the frame and keep open water or a simple reef area in the direction it faces. Avoid tail space. Empty space behind a fish often feels accidental.
Fill more of the frame than feels comfortable at first. Underwater visibility reduces contrast, and a distant fish surrounded by blue water often becomes a tiny, low-detail shape even with an expensive camera. Move closer first. Cropping is useful, but it cannot restore detail lost through several meters of water.
Look behind your subject before shooting. A dark sponge, blue water, or a clean patch of sand can separate the fish clearly, while tangled branching coral may hide its outline. Change your angle. Often moving a foot sideways produces a better background than changing any camera setting.
Try a portrait, then a behavior image. A close portrait works when the eye is sharp and the background is quiet, while a wider frame can show a goby on coral, a cleaner wrasse at work, or a school moving through a reef channel. Context matters. It gives viewers a sense of what the fish was doing.
Build better habits during the dive
Set up before you descend. Confirm the lens is clean, camera mode is correct, strobe arms are secure, and your buddy knows you may pause for photos, then do your normal gas, depth, and time checks throughout the dive. Photography never comes first. If conditions deteriorate, end the photo attempt and follow the dive plan.
Take fewer shots with a purpose. Shoot a short burst when a fish turns toward you, then review only when you are in a safe, stable position and not drifting away from your buddy or the group. Do not fixate on the screen. Situational awareness is part of every successful underwater photo.
Practice in easy conditions first. A sheltered shore dive, a calm quarry where photography is permitted, or a shallow reef with common damselfish gives you time to work on buoyancy and focus before you add current, deeper water, or fast pelagic subjects. Keep it boring at first. The skills transfer when conditions get harder.
If you are still working on buoyancy, camera handling can wait. Ask a certified instructor about buoyancy-focused training or a supervised practice session, especially if you find yourself touching the bottom, rising unintentionally, or struggling to hold a safety stop while holding a camera. Fish deserve space. So does the reef.
Common beginner mistakes
Shooting down at every fish is the most common compositional mistake. It records what you saw, but it rarely creates separation between subject and background, and it can make even a colorful fish disappear into the reef. Get level instead. A lower angle is usually the first correction to try.
Another mistake is using maximum strobe power immediately. High power can create bright scales, blown highlights, and visible particles, particularly in silty water or when the strobe is close to the lens. Start low. Adjust distance and strobe angle before adding power.
Chasing fish also wastes energy and air. If a fish swims away, stop, look for another subject, or wait quietly near suitable habitat rather than pursuing it across the reef. Patience wins here. The animal may return once it no longer sees you as a threat.
Frequently asked questions
What is the best camera setting for fish underwater?
There is no single setting for every site. Start with a shutter speed around 1/125 second for slower fish, use continuous autofocus on the eye, and choose an aperture and ISO that preserve a usable background exposure; raise shutter speed for fast fish or surge. Check your results. Your camera’s controls and available light determine the final numbers.
Should beginners use a strobe for fish photography?
A strobe is useful when you want better color and detail, especially beyond very shallow water. It also adds task loading, bulk, and opportunities for backscatter, so many beginners learn faster by practicing buoyancy and ambient-light composition before adding one. One strobe is enough. Learn its position and power before considering a second.
How close should I get to a fish?
Get as close as the fish allows without changing its behavior or damaging the habitat. Close distance improves image quality because there is less water between lens and subject, but you should never touch, feed, trap, or harass an animal for a photograph. Let the fish decide. A longer lens can help with naturally shy subjects.
Why are my underwater fish photos blue or green?
Water filters red and other warm wavelengths as depth increases. Use a strobe for close subjects, select an appropriate underwater white balance for ambient-light images, or shoot RAW and adjust color later in editing. Blue water is normal. A color correction method works best when matched to the depth, light, and camera setup.
Related posts
This article is for general informational purposes only and is not dive training or medical advice. Always train with a certified instructor and consult a doctor before diving if you have any health concerns. Gear specs, pricing, site conditions, and operator schedules change, so verify current details directly with the manufacturer or dive operator.
Disclosure: This post may contain affiliate links. If you click through and make a purchase, we may earn a commission at no extra cost to you. We only recommend gear we’ve researched or genuinely believe in.