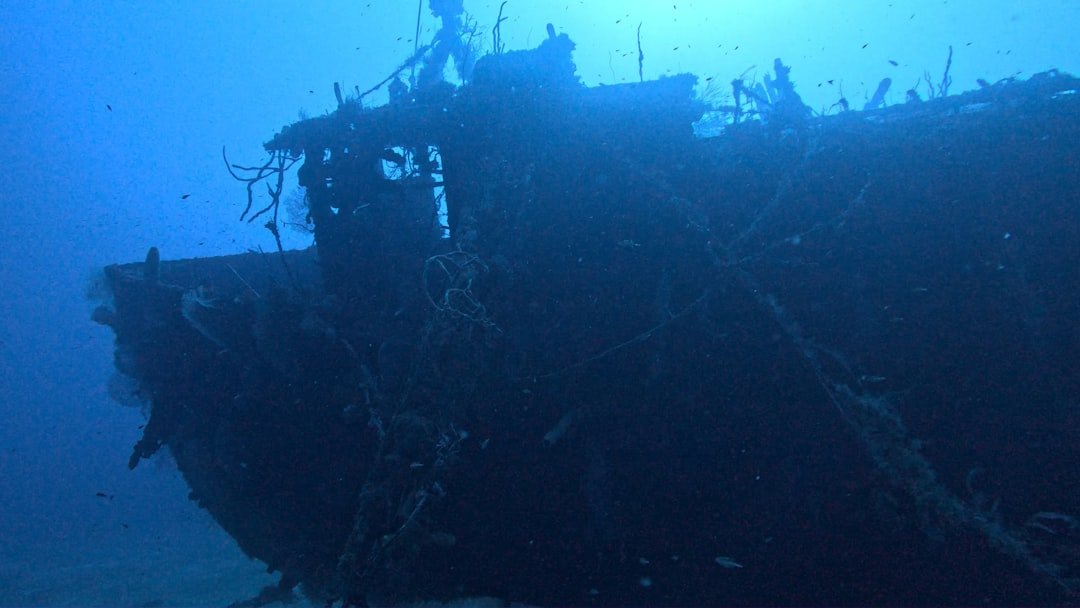
How to photograph wrecks underwater starts when you descend onto a steel hull, see it fade into blue water, and realize your normal fish-photo setup makes the whole scene look small. Get close. To photograph wrecks underwater well, use a wide lens, shoot upward or across open water, control your buoyancy, and give the wreck a clear subject rather than trying to record every inch of metal.
How to photograph wrecks underwater with wide angle technique
A wide angle technique works because wrecks are physically large, while water strips away contrast, color, and sharpness with distance. Distance is the enemy. A fisheye or rectilinear wide angle lens lets you place the camera close to a rail, gun, doorway, or propeller while keeping enough of the structure and surrounding water in the frame.
The useful rule is simple: move the camera closer before reaching for more zoom, cropping harder, or adding power to the strobes. A lens with roughly a 100 to 180 degree angle of view can include a large section of wreck at close range, but each extra foot of water between lens and subject adds suspended particles and reduces detail, especially on busy sites with sand or silty bottoms.
Start by finding one strong shape. It may be a bow rail, mast, deck gun, swim-through opening, or stern propeller. Then build the frame around that shape, using the hull lines to pull the eye toward blue water, sunlight, or a correctly positioned diver.
Choose the right lens and camera position
Fisheye lenses are often the easier wreck option because they focus very close and make it possible to exaggerate foreground metalwork. They bend straight lines. That curve can look dramatic around a bow or a propeller, though it can make a square doorway look distorted if you place it close to the edge of the frame.
A rectilinear wide lens keeps lines straighter. It needs more working distance. That extra distance can be a drawback in low visibility, but it suits broad side-on images of a wreck where straight bulkheads, rails, and deck edges matter.
Keep the lens almost touching the foreground when conditions allow. A hand-width gap is often enough. Do not scrape marine growth, rest on the wreck, or wedge yourself into openings for a better angle, because even careful contact can damage fragile life and poor trim can turn a photo attempt into a silt cloud.
Try a low shooting position first. Aim slightly upward. This puts bright surface water or open blue behind the wreck instead of a flat patch of sand, and it gives the structure more scale without requiring you to kick above it.
Build a frame with depth
Wreck photos look flat when everything sits at the same distance. Use foreground, middle distance, and background with purpose, but do not force all three into every frame. One foreground rail and a diver in open water can be enough.
Place a strong object in the nearest third of the frame, then let a rail, cable, deck line, or hull edge lead toward the larger wreck shape. Keep the foreground clean. A barnacle-covered pipe can add texture, while a random fin tip or loose line can pull attention away from the scene.
Look for diagonal lines. A bow shot from below often works because the keel and rails rise toward the surface. A centered, level shot can work too when photographing a symmetrical stern, but it needs a deliberate reason rather than being the default camera position.
Watch the edges before pressing the shutter. Wide lenses include a lot. Check for cut-off rails, partial divers, loose hoses, and bright patches of sand that distract from the main structure.
Use divers for scale without making them the whole photo
A diver gives a wreck a human reference. Keep them small. If the diver fills half the frame, the image becomes a diver portrait with some wreck behind it.
Ask a buddy to hover near a doorway, rail, or bow point, ideally against clean blue water rather than directly over a cluttered deck. Give a clear pre-dive signal plan. A simple hand point for position and an open palm to pause avoids repeated swimming back and forth, which saves gas and limits accidental contact with the site.
Tell the diver to keep knees bent, fins still, and their body angled slightly toward the wreck. Small fin movements matter. A relaxed horizontal trim usually looks better than a vertical diver dangling beside the hull, and it also reduces the chance of kicking sediment into your frame.
Set exposure for blue water and metal
Set the ambient exposure first. For many daylight wreck scenes, a practical starting point is ISO 100 to 400, shutter speed around 1/125 to 1/200 second, and an aperture near f/8 to f/11. Review the histogram and highlights, because the correct setting changes with depth, cloud cover, visibility, and the amount of sun behind the wreck.
| Scene | Starting approach | What to watch |
|---|---|---|
| Sunny shallow bow | Low ISO, faster shutter, f/8 to f/11 | Blown surface highlights |
| Dark interior opening | Raise ISO carefully or slow shutter if stable | Camera shake and diver blur |
| Green or silty water | Stay close and use restrained strobe power | Backscatter |
Use manual exposure if your camera allows it. It keeps a sequence consistent while you adjust your position. If the surface is very bright, increase shutter speed or close the aperture slightly until the blue water holds detail, then add strobe only if the nearby wreck needs color.
Strobes are for the close foreground. They cannot light an entire shipwreck. Point them outward from the lens axis, keep them behind the front of the dome or port, and begin with low power so suspended particles receive less direct light.
On a large exterior scene, available light often looks better than forcing flash onto distant metal. On a close propeller, wheelhouse window, or rail, two strobes can restore warm rust tones and texture. Take a test image. Check the corners for backscatter before committing to a sequence.
Plan the dive before bringing the camera up
Camera task loading is real. Secure the camera before descent, confirm your buddy plan, and finish buoyancy checks before you start composing. The photo can wait. A wreck may have surge, current, overhead spaces, sharp edges, fishing line, or restricted access that makes an otherwise easy camera technique unsuitable.
Stay outside overhead environments unless you have the appropriate wreck or overhead training and the dive plan supports it. A wide angle photo through an open doorway can look like penetration without entering it. Never push into a passage for an image, especially when visibility is poor or your camera blocks access to gauges, inflator controls, or a safe exit route.
Use a repeatable sequence: approach slowly, stop before the subject, establish neutral buoyancy, choose the foreground, check background water and buddy position, then take three or four controlled frames. Review after moving away. This prevents hovering in one spot while gas, current, and depth quietly change.
Good wreck photography is usually less about rare gear than disciplined distance control. Get close, keep water behind the structure when possible, light only what your strobes can actually reach, and leave enough attention for the dive itself. Practice the technique on an easy exterior wreck with a trained buddy before trying deeper, darker, or higher-current sites.
Related posts
This article is for general informational purposes only and is not dive training or medical advice. Always train with a certified instructor and consult a doctor before diving if you have any health concerns. Gear specs, pricing, site conditions, and operator schedules change, so verify current details directly with the manufacturer or dive operator.
Disclosure: This post may contain affiliate links. If you click through and make a purchase, we may earn a commission at no extra cost to you. We only recommend gear we’ve researched or genuinely believe in.