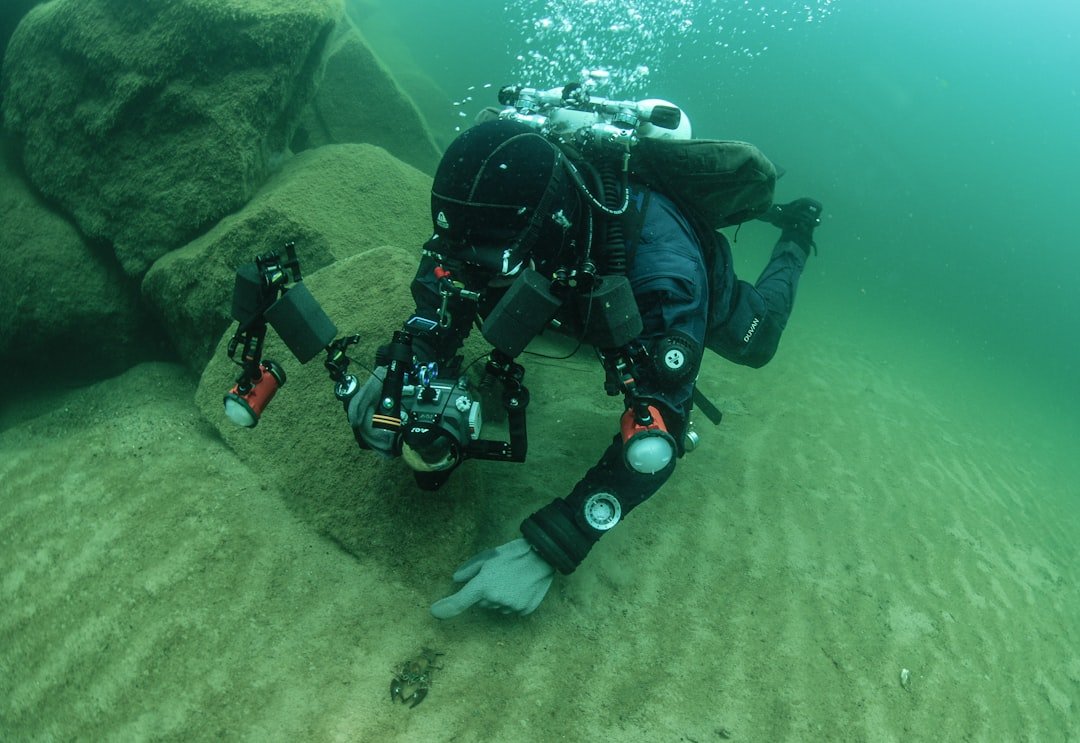
To learn how to reduce camera shake underwater, start with stable buoyancy, a compact camera hold, and slow movement before you press record. For sharper video footage, how to reduce camera shake underwater is usually less about buying a new camera and more about controlling your body, your breathing, and the shot. Start before you record. A steady diver can often make a small action camera look better than an unstable diver using a large camera rig with strong stabilization.
How to reduce camera shake underwater with buoyancy
Good buoyancy is the base layer for smooth footage because every correction you make with your hands, fins, or inflator can travel straight into the camera. Stay still first. If you are rising or sinking while filming, your video may look like it is drifting even when the camera itself is held firmly. Set your buoyancy before approaching the subject, then give yourself a few seconds to settle before recording.
Trim matters too. A diver who is slightly head-up often has to bicycle their fins or make frequent sculling movements to hold position, while a diver who is level can glide with smaller corrections and keep the camera pointed where it needs to be. Stay level. If your legs drop, check whether your cylinder position, weight placement, fin buoyancy, or exposure suit is pulling you out of trim. A certified instructor can help assess weighting and trim in open water, which is far more useful than trying to fix a major buoyancy issue by gripping the camera harder.
A calm breathing pattern helps. Do not hold your breath, since that is unsafe underwater and can upset your buoyancy anyway. Breathe normally. Instead, begin a clip after an exhale or during a quiet part of your breathing cycle when your torso is less likely to rise. This is a small timing habit, but it can reduce the visible up-and-down bob that often appears in close video clips.
Hold the camera like a stable platform
Keep the camera close to your body rather than holding it far out in front of you, because extended arms magnify every movement from your shoulders and wrists. Tuck your elbows. With a compact camera or action camera, use both hands whenever possible and form a relaxed triangle between your hands, arms, and chest. A death grip can create tiny jerks, especially when you press a record button or adjust a control.
If you use a tray with handles, hold both handles evenly and keep your wrists straight instead of bending them inward. Go light. A camera system that is too negatively buoyant tires your forearms, while one that floats upward may pull your hands out of position each time you stop swimming. Many divers aim for a housing that feels close to neutral in the water, but the correct buoyancy setup depends on the housing, lights, arms, lens accessories, and the salinity of the dive site.
For a larger rig, add buoyancy floats gradually rather than attaching several at once and hoping for the best. Test it shallow. Hold the complete system loosely in front of you at the surface or in confined water, then see whether it sinks, rises, or remains manageable at the depth where you expect to film. A rig can change buoyancy as air spaces compress, so check its behavior during a safe, low-stress dive before relying on it for a planned shoot.
Move your whole body slowly
The cleanest underwater video usually comes from deliberate body movement, not fast camera pans. Slow down. When you want to change direction, rotate your torso and shoulders together instead of swinging the camera with your wrists. That keeps the framing more level and avoids the abrupt side-to-side wobble that becomes obvious when viewers watch the footage on a large screen.
Use gentle frog kicks or small flutter kicks when the bottom and conditions allow, and stop finning before you start a static shot. Pause first. A few seconds of still footage at the beginning and end of a clip gives you cleaner edit points later. It also helps you notice whether you are drifting, whether your subject is moving away, or whether sediment is about to enter the frame.
Do not chase every subject. If a turtle, fish, or ray is moving quickly, pick a direction that is safe for you and wait for it to cross your frame rather than accelerating behind it with the camera held ahead of your body. Let it pass. This approach usually produces a more watchable clip, and it reduces the risk of poor buoyancy, contact with coral, or an uncontrolled ascent while you focus on the screen.
Choose camera settings that support steady footage
Electronic stabilization can help, but it cannot fully repair a clip with large body movements, rapid panning, or strong surge. Use it wisely. On many action cameras, stronger stabilization modes crop the image, which can make a wide scene look tighter and can change how close you need to get to a subject. Check your camera manual for the current stabilization mode, crop behavior, resolution limits, and battery impact.
A faster shutter speed can make individual frames look sharper, but it may also make movement appear more jittery because there is less motion blur between frames. Light is limited. For a natural-looking result, many video shooters try to keep shutter speed near twice the frame rate when light and camera controls allow, such as roughly 1/60 second for 30 frames per second. Underwater, that target may not be practical without adding light, raising ISO, or opening the aperture on a camera that allows those controls.
If your camera uses automatic exposure, avoid filming through large swings between bright surface light and dark reef shadows when possible. Keep it simple. Exposure changes can look like a camera problem even when your hold is solid. Lock exposure or white balance if your camera offers those controls and you understand how to reset them, especially when you are filming one subject at a consistent depth and distance.
Use the widest practical field of view for moving shots because wide footage hides small shakes better than a narrow or zoomed-in view. Get closer instead. Water reduces contrast and color, so moving closer to a subject is usually better than using digital zoom from several metres away. Maintain a respectful distance, avoid blocking an animal’s path, and follow site rules and your dive guide’s instructions.
Plan shots for sharper video footage
Give each clip one job. A short, steady clip of a fish feeding, a diver passing a reef wall, or a wide reef scene is easier to hold than a clip that starts wide, zooms, pans, follows a subject, and then changes exposure. Keep the idea small. Before recording, decide whether you want a static shot, a slow pass, or a follow shot.
- Set your depth and buoyancy. Stop kicking until you feel balanced.
- Frame the scene. Keep your elbows tucked and leave a little room around a moving subject.
- Record for several seconds. Start still, then make one slow movement if the shot needs it.
- Stop before repositioning. Do not try to rescue every imperfect shot with a fast pan.
For a simple example, imagine you want a ten-second clip of a clownfish near an anemone. Hold position about a comfortable, non-intrusive distance away, record three seconds without movement, make a slow five-second push only if you can do it without stirring the bottom, then hold two more seconds before stopping. Count silently. That sequence gives you usable footage even if the middle movement is not perfect.
Use accessories carefully
A tray, handles, and neutral buoyancy arms can make a camera easier to control, especially when lights turn a small setup into a front-heavy rig. Keep it balanced. However, extra hardware also adds drag, packing bulk, and more attachment points that can snag or swing if they are not secured. Choose the smallest setup that gives you a comfortable, stable hold for the type of diving you actually do.
A lanyard is useful as a backup retention device, but do not let a camera hang loose while swimming because it can bump your body, strike the reef, or create sudden jerks when you grab it again. Clip it close. Check clips, bolts, and mounting screws before entering the water, and make sure no loose accessory can interfere with your alternate air source, inflator hose, gauges, or other essential equipment.
Some cameras offer horizon leveling, gyro data, or post-production stabilization. These tools can rescue mild wobble. They cannot make an erratic clip look naturally smooth without cropping the image or creating warped edges around coral, wreck lines, or diver silhouettes. Shoot as steadily as you can first, then use editing as a finishing tool rather than your main plan.
Practice where the stakes are low
Practice the same short sequence in a pool or calm, shallow site before trying it during current, surge, low visibility, or a demanding boat dive. Start easy. Film a fixed object for ten seconds, then review whether the image rises with each breath, tilts during fin kicks, or jolts when you touch the controls. One clear problem is easier to fix than a vague feeling that the footage looks shaky.
Try one variable at a time. First work on buoyancy, then elbow position, then a slow pan, rather than changing your weighting, grip, frame rate, stabilization setting, and kick style all on the same dive. Take notes. A short note after each dive about depth, current, camera setup, and what went wrong can reveal patterns that are hard to remember after several dives.
FAQ
Should I use camera stabilization underwater?
Yes, if your camera has it and the crop still gives you the framing you want. Turn it on. Stabilization is helpful for small vibrations and gentle swimming, but good buoyancy and slower camera movement still make the biggest difference. Test different modes before a trip because the strongest setting may reduce resolution, narrow the view, or drain the battery faster.
Why does my underwater video shake when I am not moving?
Your breathing, fin corrections, current, surge, and a camera that is too heavy or too floaty can all create movement. Check your trim. Review a static clip and look for a pattern: regular vertical movement often matches breathing, while side-to-side movement may come from finning or current. If buoyancy control is a concern, work with a certified instructor rather than trying to solve it only with camera technique.
Is a tray better than holding an action camera by hand?
A tray can provide a steadier two-handed grip and a more balanced feel, especially with lights attached. It adds bulk. For travel or casual wide-angle clips, a small hand grip may be enough if you can keep your elbows tucked and avoid fast movements. The better choice is the one you can hold securely without distracting you from safe diving.
What frame rate is best for smooth underwater video?
Thirty frames per second is a practical starting point for general underwater video, while 60 frames per second gives you more flexibility for slow motion in editing. Match it to the light. Higher frame rates often need faster shutter speeds or more available light, which can increase image noise or produce darker footage at depth. Choose a setting you can expose properly on the dive.
Can I stabilize shaky underwater footage afterward?
Editing software can improve mild shake, especially on wide clips with clear edges for the software to track. Expect trade-offs. Stabilization often crops the frame and may distort straight wreck lines or moving reef details. Keep the original file, apply stabilization lightly, and compare the result against the unstabilized clip before committing to a heavy crop.
Related posts
This article is for general informational purposes only and is not dive training or medical advice. Always train with a certified instructor and consult a doctor before diving if you have any health concerns. Gear specs, pricing, site conditions, and operator schedules change, so verify current details directly with the manufacturer or dive operator.
Disclosure: This post may contain affiliate links. If you click through and make a purchase, we may earn a commission at no extra cost to you. We only recommend gear we’ve researched or genuinely believe in.