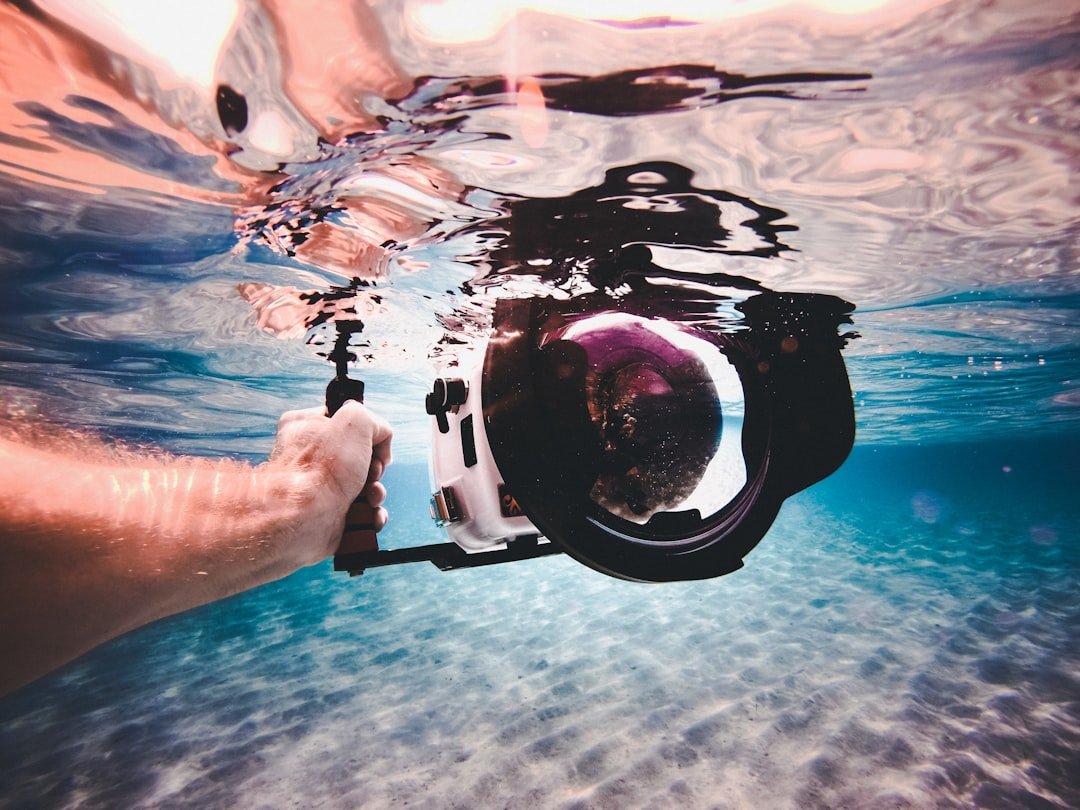
Start by writing down the deepest dive you expect to make, then only compare cameras and housings rated beyond that depth. That single filter removes a lot of bad options. The best underwater camera for beginners is rarely the cheapest waterproof camera on a shelf, because a 10 to 15 m rating may be fine for a beach swim but is not enough margin for ordinary recreational scuba diving. For a new diver who wants compact and affordable gear, a tough compact camera in a proper housing is often the most practical place to begin.
Keep the first setup simple. A camera you can reach, aim, and operate with gloves will produce more usable photographs than a technically better system left on the boat because it feels bulky or intimidating. Camera quality matters, but water conditions and light matter more. Blue water removes warm colors quickly, while suspended sand or plankton can turn flash into bright backscatter.
Best underwater camera for beginners starts with depth
Do not treat a waterproof rating as a scuba rating. Many rugged compact cameras are rated to around 10 or 15 m without a housing, and that rating has little safety margin for a dive that can reach 18 m, or deeper where local training and conditions allow. Check the manufacturer’s current rating. Pressure rises fast underwater, and a flooded camera can also leave you distracted during a dive.
A housing changes the equation. A manufacturer housing or a well-supported third-party housing can take a compact camera to roughly 40, 45, or 60 m, depending on the model, and it also gives you larger controls that are easier to use underwater. That is useful. Still, every housing has an O-ring, buttons, and seals that need care.
For beginner shopping, look for a stated housing depth rating that exceeds your normal dive depth by a comfortable margin. A 40 m housing is common for recreational travel. Inspect the exact camera and housing pairing, since similar-looking housings are not interchangeable and a new camera revision may require a different model.
Choose the camera category before the brand
There are three realistic compact routes: a sealed underwater camera, a rugged compact with a housing option, or a smartphone housing. Each has a different compromise. None is automatically best.
Sealed underwater cameras
A sealed camera has no user-opened battery door or memory-card hatch. That removes one common flood point. The SeaLife Micro 3.0 is a frequently researched option in this group, with a permanently sealed body, an advertised 60 m depth rating, 4K video capability, and large controls intended for underwater use.
Its appeal is clear. You charge it through its external contacts and transfer files wirelessly, so there is no O-ring to clean every time you change a battery or card. The trade-off is equally clear: a sealed battery cannot be swapped during a long day on dive boats, and wireless file transfer can be slower or less convenient than removing a card. Check its current package contents and pricing before buying.
This route suits divers who value low flood risk and simple operation over maximum control. It is also useful for people who do not want to maintain a housing. The upfront cost may be higher than a basic rugged compact, though.
Rugged compacts with housings
The OM System Tough TG-7 is widely considered during beginner research because the camera itself is small, has a useful close-focus mode, records video, and has a built-in lens that starts fairly wide for a compact. It is rated for shallow underwater use without a housing, while the dedicated underwater housing extends its usable depth substantially. The camera is small.
This type of setup gives you flexibility. You can use the camera without a housing for rain, pool, kayaking, or snorkeling within its stated limit, then add the housing for scuba. It also normally accepts removable batteries and memory cards, which helps on a two- or three-dive day. A spare battery is cheap insurance.
The compromise is sensor size. Rugged compacts generally use small sensors, so fine detail, dynamic range, and low-light image quality will not match a larger interchangeable-lens camera. That does not make them poor underwater tools. It means you need to get close, use available light thoughtfully, and eventually consider a strobe if photography becomes a bigger part of your diving.
Smartphone housings
A phone housing can be compact and surprisingly capable because recent phones have good screens, familiar controls, and competent image processing. Housings from companies such as Divevolk are commonly researched because they allow touchscreen access through a membrane and are marketed for scuba depth ratings. Your phone stays useful.
This option has real caveats. A phone can overheat, battery life may drop, some housings are bulky, and a major flood risks a device that contains far more than holiday photos. Wide phone lenses can also be weak in dim water, while digital zoom is rarely useful underwater. Verify phone compatibility carefully, especially after a phone upgrade.
A smartphone housing makes sense if you already understand your phone camera and accept its flood risk. It is less attractive if losing the phone would ruin a trip. Consider a dedicated camera for remote liveaboards or trips where communication matters.
Sensor and lens limits matter underwater
Ignore headline megapixels at first. A 16 MP compact does not automatically beat a 12 MP compact, especially in low light, because sensor size, lens brightness, autofocus, and image processing all affect the finished image. Underwater, clean light is scarce. That is why close subjects often look better than distant reef scenes.
For compact cameras, look for a lens that starts wide, ideally around 24 to 28 mm in full-frame equivalent terms. Wide-angle coverage lets you get physically close to coral, a turtle, or a wreck detail while keeping more of the scene in frame. Closer is better. Less water between lens and subject means more contrast, color, and sharpness.
Zoom sounds useful on land but has limited value underwater. Optical zoom can help with skittish fish in clear water, yet zooming from several metres away usually records more blue or green water between you and the animal. Do not chase marine life. Move slowly, stay streamlined, and photograph only when your buoyancy and position are under control.
A close-focus or microscope mode is genuinely useful on a compact. It can capture nudibranchs, shrimp, tiny crabs, and coral texture without buying a separate macro lens. These modes need steady hands and good technique. A focus light or small video light can help, but do not shine strong lights into an animal’s eyes at close range.
Manual controls are useful, not mandatory
Full manual exposure sounds like a requirement. It is not. A beginner can get solid holiday images with automatic exposure, exposure compensation, and a sensible white-balance setting, provided they stay close to the subject and work in decent visibility.
Still, seek access to a few controls. Exposure compensation lets you brighten a dark diver or tame a pale sandy bottom. White balance options can improve ambient-light photos in shallow water. Focus mode selection is helpful when the camera keeps grabbing particles instead of the fish’s eye.
RAW capture is a nice upgrade. RAW files retain more editing latitude than JPEGs, particularly when a camera has guessed white balance poorly, but they require editing software and take more storage space. JPEG is easier. If you are learning, shoot JPEG plus RAW only if the camera has enough card space and you will actually review the files later.
Control layout matters more than specification sheets suggest. Review photos of the housing’s rear buttons and check whether reviewers report stiff controls, unclear labels, or buttons that are hard to press with gloves. Try a rental setup if possible. Five minutes in a shop is not the same as a current, bouncy dive.
Budget for light and housing care
Most beginning buyers underestimate accessories. The camera price is only the start, particularly for a housed compact. Allow for a memory card, spare battery if the design permits one, lanyard, camera tray, silicone grease recommended by the housing maker, and a basic padded case.
A tray with two handles improves stability and makes the camera less likely to twist in your hands. It also provides attachment points for lights later. Start with a compact tray. Huge dual-handle rigs can wait until you know that underwater photography is a lasting hobby.
For still photography, an external strobe is the biggest quality upgrade once you move beyond close shallow-water snapshots. A strobe restores warm color and freezes motion far better than a continuous video light. It costs more. It also adds arms, clamps, charging, aiming practice, and a need to control backscatter.
A video light is easier for beginners to understand because you see its effect immediately. It is useful for night-diving video and close subjects, but it may be too weak to light a wide reef scene during daylight. Do not buy lights based on lumen numbers alone. Beam angle, burn time at the selected power, color quality, and underwater handling are more useful details.
Prices vary by region. As a broad shopping reality, entry rugged compacts may cost a few hundred dollars or pounds, while a camera, housing, tray, spare battery, and a decent light can quickly approach or exceed the price of a more advanced camera body. Set a total budget before choosing the camera. That prevents a cheap camera from becoming an expensive dead end.
Research-based compact options to compare
The OM System Tough TG-7 with its matched underwater housing is a sensible comparison point for divers who want a pocketable camera, close-up capability, removable batteries, and room to grow into lighting. It is not a large-sensor low-light camera. Its value is convenience and an established accessory path.
The SeaLife Micro 3.0 is worth comparing for divers who want a sealed, straightforward camera with a deeper stated rating and no housing O-ring routine. Its fixed battery and wireless transfer workflow are the deciding compromises. Read the current manufacturer information on charging, storage, and supported apps before committing.
Older TG-series cameras and previous-generation compacts may appear at attractive used prices. Used gear can save real money. Buy only after checking housing compatibility, button function, battery condition, corrosion around metal parts, and the condition of every O-ring groove.
Action cameras such as GoPro models or DJI action cameras are excellent for wide video clips, helmet-free point-of-view footage, and simple travel packing when used with an appropriate dive housing. They are less satisfying for still fish portraits because their ultra-wide lenses make subjects look distant unless you get very close. They also provide limited exposure control compared with a purpose-built compact camera. Treat them as video-first tools.
A used mirrorless camera in a housing may look like a bargain, but it is rarely the most affordable beginner system after you add ports, lenses, strobes, arms, batteries, and maintenance. It can produce better images in skilled hands. It also creates a larger, heavier task load underwater. Start smaller if your main aim is to document dives rather than build a dedicated camera system.
Set up and test before travel
Read the housing manual cover to cover. That sounds dull. It is cheaper than discovering an unfamiliar latch or alarm on the first dive of a trip.
Before each day, inspect the main O-ring under bright light, remove hairs or grit with a clean lint-free cloth or approved method, and use only the amount and type of lubricant specified by the manufacturer. Too much grease attracts debris. Do not use petroleum products unless the maker explicitly approves them.
Close the empty housing and test it in fresh water before putting the camera inside, especially after travel or O-ring maintenance. Watch for bubbles and inspect for moisture. A vacuum leak detector, if the housing supports one, adds reassurance but does not replace visual checks and careful sealing.
On the dive, attach the camera securely but do not let it drag across coral or sand. Practice buoyancy before concentrating on pictures. A certified instructor can help you improve trim and task loading safely, and that training does more for your photos than any camera upgrade.
Rinse the sealed system in fresh water after diving, soak controls according to the manufacturer guidance, and press buttons gently while submerged in rinse water if the manual permits it. Dry the outside before opening any housing. Saltwater droplets can fall onto the seal or camera when you rush.
The practical buying decision
Choose a sealed underwater camera if your priority is the simplest scuba-ready package and you can live with a fixed battery. Choose a rugged compact plus housing if you want replaceable batteries, close-up shooting, and an easier path toward strobes. Choose a phone housing only if you are comfortable risking your phone and have confirmed the housing works with your exact device.
For most new underwater photographers, the compact camera plus a manufacturer-supported housing is the balanced answer. Keep the first trip focused on stable buoyancy, getting close without touching the reef, and taking a few deliberate frames instead of hundreds of distant snapshots. Start modestly. The best setup is the one you can carry, maintain, and use calmly underwater.
Related posts
This article is for general informational purposes only and is not dive training or medical advice. Always train with a certified instructor and consult a doctor before diving if you have any health concerns. Gear specs, pricing, site conditions, and operator schedules change, so verify current details directly with the manufacturer or dive operator.
Disclosure: This post may contain affiliate links. If you click through and make a purchase, we may earn a commission at no extra cost to you. We only recommend gear we’ve researched or genuinely believe in.