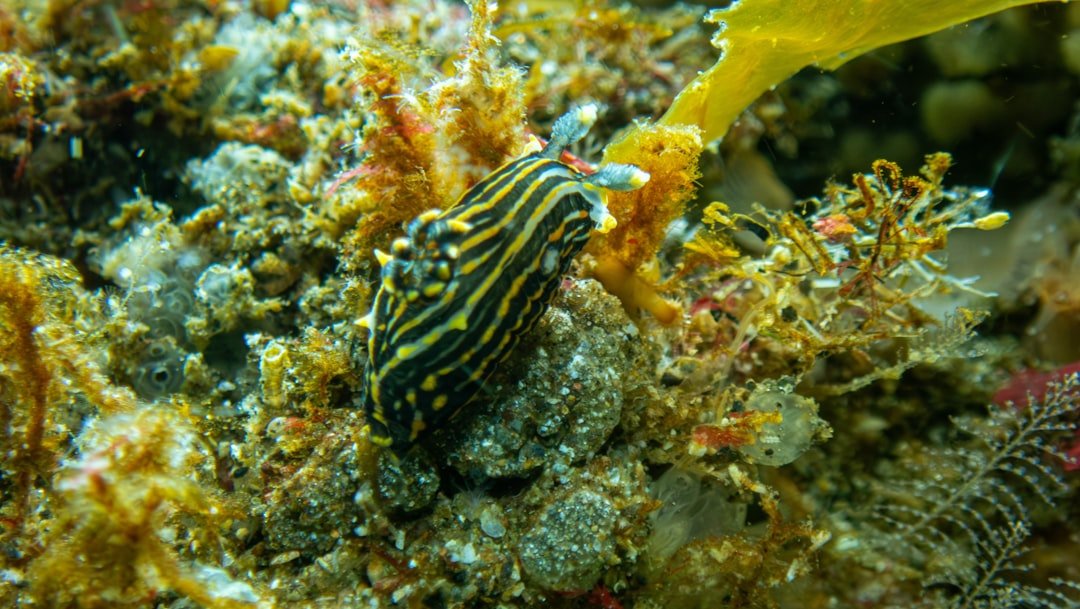
How to shoot macro photography underwater is mostly about getting stable, approaching slowly, and placing light close to a tiny subject without touching the bottom. For small critters, how to shoot macro photography underwater also means accepting that your best image may come from one careful frame rather than fifty rushed ones. Start with buoyancy. A good macro photo is rarely worth a damaged coral head, a cloud of sand, or an animal pushed into hiding.
Macro diving rewards patience. The subjects are small, often moving, and easily blocked by surge, suspended particles, or your own breathing rhythm. I find that divers who are comfortable hovering before they pick up a camera get usable images far sooner than divers trying to solve buoyancy and camera controls at the same time. Keep it simple. If your trim or buoyancy is still developing, work with a certified instructor before adding the distraction of a camera near delicate marine life.
How to shoot macro photography underwater with a stable setup
Use the smallest camera system that gives you the control you need. A compact camera with a wet macro lens can be a sensible entry point, while an interchangeable-lens camera in a housing gives more control over focus, aperture, and lighting. Bigger is not always better. Large housings can be awkward in tight spaces, especially when you are trying to hold position beside a sponge or beneath a ledge.
For dedicated macro work, choose a true macro lens or a close-up wet lens that can focus at short distances. A lens with a working distance of several inches gives you room to light a subject, while extremely high magnification can put the port so close that the critter retreats or the strobe cannot reach around the lens. Check compatibility carefully. Housing ports, wet lenses, bayonet mounts, and camera focal lengths do not automatically work together.
Set up your camera on land before the dive. Confirm that the battery is charged, the memory card has space, the port O-ring is clean, and every control moves freely after the housing is closed. One hair, grain of sand, or twisted O-ring can flood a housing. Do the manufacturer’s recommended pre-dive checks, and inspect the housing for bubbles during your initial descent.
Neutral buoyancy is your camera support. Before taking photos, stop at a safe depth over a sandy patch or clear water and practice hovering without using your hands or fins for corrections. Tiny adjustments matter. If you cannot pause motion for a second or two, use a faster shutter speed, reduce magnification, or skip that subject until conditions are calmer.
Good fin position protects the site. Keep your knees bent, fins higher than the reef, and your body horizontal enough that you do not stir sediment behind you. On a silty muck site, even one careless kick can ruin the next several minutes of shooting for you and nearby divers. Give yourself space. Do not brace on coral, rocks with living growth, or the seabed to steady the camera.
Camera settings for small critters
Manual exposure gives the most repeatable macro results because it lets you control how much ambient water background appears while your strobes light the subject. A useful starting point for many small, stationary subjects is shutter speed around 1/160 to 1/250 second, aperture around f/11 to f/16, and a low ISO such as 100 to 400. This is only a starting place. Your camera’s flash-sync limit, water clarity, depth, and subject motion all affect the final setting.
| Situation | Starting approach | What to change first |
|---|---|---|
| Still nudibranch or shrimp | f/11 to f/16, low ISO, moderate strobe power | Close aperture for more depth of field |
| Moving goby or blenny | Near flash-sync shutter speed, continuous focus if reliable | Raise shutter speed within sync limits |
| Dark background portrait | Low ISO, faster shutter speed, controlled strobe output | Reduce ambient exposure before adding flash |
| Strong surge | Lower magnification and a faster shutter speed | Back away slightly for more keeper frames |
Aperture controls depth of field, which is very thin at close range. At high magnification, an eye can be sharp while the face is soft just a few millimeters behind it. Stop down first. If the whole animal still will not fit in focus, shoot a side-on composition, increase your distance a little, or make a focus-stack series only when the subject and water are steady enough.
Shutter speed mainly controls ambient light and motion blur, while strobe duration can freeze a still subject at close range. Fast-moving animals remain difficult. If a shrimp keeps waving antennae or a fish darts in and out of a hole, take a wider composition, pre-focus on the area it returns to, and wait rather than chasing it.
Use the lowest practical ISO because high ISO can add noise and reduce flexibility when editing. Modern cameras tolerate higher ISO better than older models, but macro strobe photography usually gives you enough light to avoid pushing it hard. Test your own system. A clean ISO 800 image is more useful than a blurry ISO 100 image.
Focus on the nearest eye whenever the animal has one that is visible. Eyes draw attention. With a camera that supports it, use a small single autofocus point and place it directly over the eye or the closest important detail, such as a rhinophore on a nudibranch. Back-button focus can help some shooters separate focus from shutter release, though it takes practice before a dive trip.
Light the subject without backscatter
Strobes make macro images pop because they restore color lost underwater and let you use a smaller aperture. They also reveal every suspended particle between lens and subject. Keep the strobe heads wide. Aim them slightly outward so the edge of each beam lights the critter while the brightest center of the beam misses the water directly in front of the port.
Begin with both strobes slightly behind the front of the lens port, angled outward, and about level with the subject. Take one frame. If you see bright white dots, move the strobes farther apart, pull them back, or increase their outward angle before changing camera exposure.
Strobe distance changes softness. A strobe close to the subject at lower power can give softer light and faster recycle times than a distant strobe firing hard, although close placement gets harder when a lens port is almost touching the animal. Watch your arms. Long strobe arms can drift into coral, kick up silt, or catch a buddy’s hose in confined spaces.
One strobe is often enough for a small subject and can create a cleaner image in poor visibility. Put it above and a little to one side, then adjust until the eye has light without casting a harsh shadow across the face. Try restraint. Flat, full-frontal lighting can document a critter clearly, but angled light usually shows texture on a crab shell, nudibranch gills, or scorpionfish skin.
A focus light can make autofocus easier on a dark subject, but avoid shining it continuously into an animal’s eyes at close range. Use the dimmest practical setting and turn it off when you do not need it. Some dive operators and sites have specific wildlife-light rules. Follow them.
Find and approach subjects responsibly
Look slowly across likely habitat instead of swimming fast while scanning everywhere. Nudibranchs may be on hydroids, algae, or sponges. Shrimp and crabs may sit under ledges. Gobies often return to a favored perch after a short retreat, which makes them better subjects than an animal you have to pursue.
Approach on the animal’s level when possible. A camera pointed downward can create a record shot, but an eye-level angle often separates the subject from the seabed and gives a more natural view. Lower yourself by adjusting buoyancy and body position, not by grabbing anything. Keep breathing slowly.
Never move, feed, poke, or block a critter for a picture. Do not turn over rocks or manipulate marine life for a cleaner background. That behavior can injure animals and disrupt the habitat, even when the subject appears small or common. Let it choose. If it retreats, stop and find another composition or another subject.
Think about your buddy and dive plan too. Macro photographers can become absorbed in one square meter of reef, so agree on communication, turnaround pressure, maximum depth, and separation procedures before the dive. Check your gauges. A photo is not a reason to extend a planned bottom time or ignore a no-decompression limit.
A repeatable macro shooting sequence
- Spot the animal, then pause far enough away to assess current, bottom contact risk, and your buddy’s position.
- Choose one composition before moving closer, usually eye level or a clean side profile.
- Set shutter speed, aperture, ISO, and strobe power for the background you want.
- Hover in place and approach only as the subject remains relaxed.
- Place the focus point on the nearest eye or key feature.
- Take one test frame, check focus and backscatter, then adjust strobe angle before changing several settings at once.
- Make a small series with subtle changes in framing, then leave the animal undisturbed.
This sequence saves time underwater. Changing only one variable after each test image makes it much easier to understand why a frame improved or failed. For example, if a close shrimp photo is exposed correctly but filled with backscatter, keep your exposure settings and move the strobes outward first. Do not immediately raise ISO or open the aperture.
Common macro photography mistakes
Getting too close too soon is the usual mistake. The animal may hide, the lens may cast a shadow, and your focus distance may become too short for the system. Back up slightly. A sharper image with a little more background is usually better than a soft frame that crops off antennae or fins.
Another problem is trying to make every image ultra-magnified. High magnification magnifies surge, breathing movement, focus error, and backscatter as well. Use it selectively. A wider macro frame can show the animal’s environment and may be easier to light cleanly.
Review images during a calm moment, but do not spend the whole dive staring at the screen. Check sharpness at high magnification, not only overall brightness. Look for eye focus. If your photos are consistently soft, use a smaller aperture, stabilize your hover, and shoot when your body is at the quiet point between breaths.
Frequently asked questions
Do I need two strobes for small critters?
No. One strobe can make strong macro images, particularly in murky water or when you want directional light. Two strobes give more even coverage and flexibility for larger subjects. Start with what you can control well.
What is the best aperture for underwater macro?
There is no single best aperture. Many photographers begin around f/11 to f/16 because it gives more depth of field, but diffraction, strobe power, sensor size, and the desired background all matter. Test your lens. Check sharpness at several apertures in real water conditions.
Why are my macro photos full of white specks?
Those specks are usually backscatter from particles lit by your strobes. Move the strobes wider and farther behind the lens plane, angle them outward, and avoid kicking up sediment. Water visibility matters. Sometimes the cleanest solution is to shoot a different subject or wait for better conditions.
Can I use a video light instead of a strobe?
You can, especially with a compact camera, but video lights usually have less power than strobes and may require a higher ISO, slower shutter speed, or wider aperture. They are useful for seeing focus. Strobes give more control for crisp still images at small apertures.
How close should I get to a nudibranch or shrimp?
Get only as close as your lens needs and the animal tolerates. If it withdraws, changes behavior, or you need to touch the bottom for position, you are too close. Respect the subject. A longer working distance also makes lighting easier.
Related posts
This article is for general informational purposes only and is not dive training or medical advice. Always train with a certified instructor and consult a doctor before diving if you have any health concerns. Gear specs, pricing, site conditions, and operator schedules change, so verify current details directly with the manufacturer or dive operator.
Disclosure: This post may contain affiliate links. If you click through and make a purchase, we may earn a commission at no extra cost to you. We only recommend gear we’ve researched or genuinely believe in.