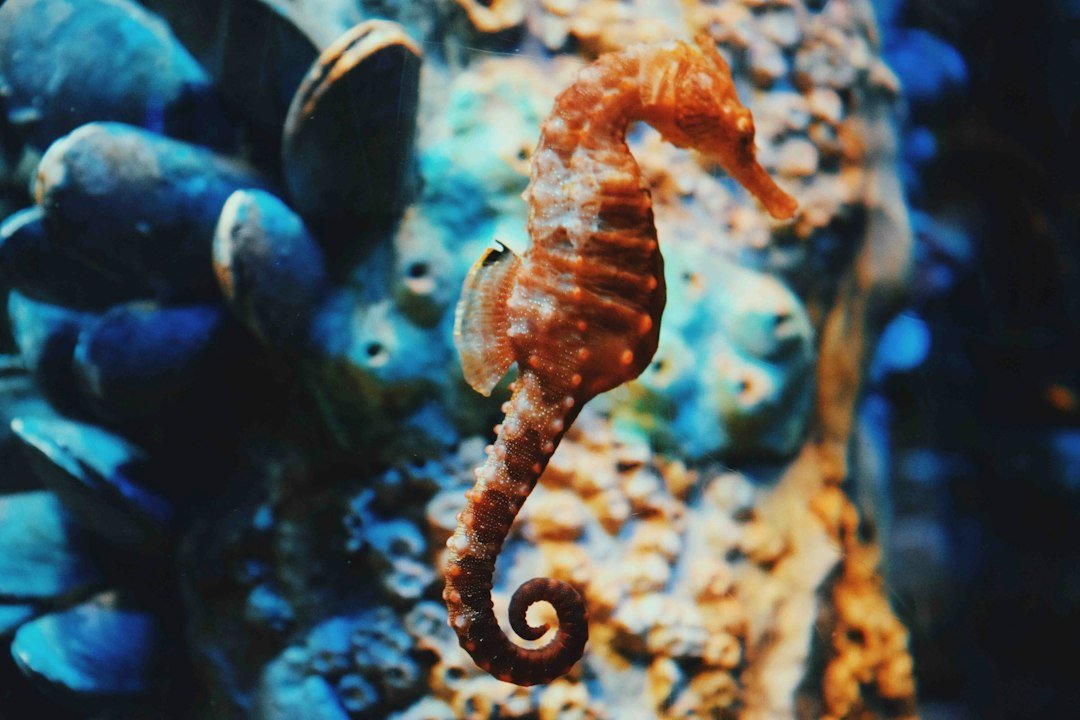
A common misconception is that photographing seahorses underwater requires getting your lens almost against their snout; the better approach is calm positioning, restrained light, and enough distance for the animal to stay settled. Give them room. Learning how to photograph seahorses underwater is mostly a buoyancy and patience exercise, while the camera settings simply help you capture the moment once you are stable.
Seahorses are small, often cryptic, and commonly found where surge, silty bottoms, or busy dive traffic make close macro work difficult. They also move more than many new macro photographers expect. Their tails anchor them, but their heads rock with water movement and their eyes track independently, so an image that looks sharp on the rear screen may still miss the eye at full size.
How to photograph seahorses underwater with respect
Start by observing before you raise the camera. Stop early. A seahorse that has just been found may be orienting itself, feeding, or trying to remain hidden among hydroids, algae, sponges, or seagrass. Rushing in with a bright focus light can make the encounter shorter for everyone.
Approach slowly from the side rather than directly overhead, then settle at a distance where you can hold your own position without touching the bottom or grabbing reef structure. Stay horizontal. If the site has sand or muck, keep fins high and still because one careless kick can cover the subject and nearby divers in silt.
Watch for stress cues and back off when you see them. Repeated turning away, rapid relocation, a clear attempt to hide, or altered posture after your lights fire are all good reasons to stop shooting. Take the hint. Local rules may also prohibit flash photography, restrict access, or ask divers not to crowd known animal locations, so follow the briefing and the operator’s guidance. These are general references that vary by site and operator, not references to any specific organization or authority.
Never move a seahorse for a cleaner background, fan away nearby debris, or ask a guide to place one on a prettier coral head. Leave it alone. A natural image with a distracting branch is better than a polished image made by disrupting an animal.
Set up the dive before the photo
A solid photo begins before you see the subject. Check that your housing is sealed, confirm battery and card space, and set a sensible starting exposure while you still have time. Make it easy. Searching through menus while hovering over a small animal wastes the best part of the encounter.
For most compact, mirrorless, and DSLR macro setups, manual exposure gives repeatable results because shutter speed controls ambient brightness while aperture and strobe output shape the subject exposure. Strobes do the freezing. If you shoot with a compact that has limited manual control, use its macro mode, choose the fastest available shutter option, lower ISO where possible, and use exposure compensation only after you understand how the camera handles flash.
Use a focus light with a narrow, modest beam if your system has one, but avoid shining it continuously at close range for a long time. Keep it gentle. Red light can be less visually intrusive to some subjects, although it is not a license to linger or ignore animal behavior.
Check your lens choice before descent. A true macro lens gives the most detail, but it demands closer focus and makes surge more obvious; a longer macro focal length gives more working distance, although it narrows the angle of view and can be harder to hold steady. There is no universal winner. Your comfort in the water matters more than maximum magnification.
Macro camera settings that give you a usable starting point
These macro camera settings are starting points, not fixed rules, because a dark muck dive, shallow seagrass bed, and clear wall can have very different ambient light. Begin simple. Then change one control at a time after checking the histogram, blinkies, or image review on your own camera.
The shutter and aperture values below are examples only and can vary substantially by camera, housing, lens, strobe, sync capability, water conditions, and shooting distance.
| Situation | Starting shutter speed | Starting aperture | ISO and flash approach |
|---|---|---|---|
| Calm water, close portrait | 1/160 to 1/200 sec | f/11 to f/16 | Low native ISO, low strobe power |
| Gentle surge or moving head | 1/200 to 1/250 sec if supported | f/13 to f/18 | Low ISO, move strobes closer rather than increasing power first |
| Seagrass with visible blue or green water | 1/125 to 1/200 sec | f/8 to f/13 | Use low strobe power and expose ambient light deliberately |
| Dark muck or night dive | 1/160 to 1/250 sec | f/11 to f/18 | Low ISO, controlled strobe light, dark background |
For a worked example, set 1/200 second, f/13, ISO 100 or your camera’s lowest clean native setting, and both strobes at low power. Take one frame. If the seahorse is dark but the background looks right, increase strobe power a small step or bring the strobes slightly closer; if the whole frame is too bright, first reduce strobe output before changing several settings at once.
Use the highest shutter speed your camera and strobes can synchronize reliably, according to the equipment manuals. On many camera and housing setups, this falls within a common range rather than one universal number. Check this first. A faster shutter reduces ambient blur and darkens the water behind the animal, but it does not stop motion caused by a long-duration strobe burst at high power.
Aperture is your main depth-of-field tool. At high magnification, even f/16 may leave only the eye and a thin slice of the face sharp, particularly when the seahorse angles toward or away from you. This is normal. Do not chase extreme apertures blindly, because diffraction can soften detail on some cameras and high strobe power can slow recycle time.
Keep ISO low when you can, since macro images often need clean detail in fine skin texture and dark backgrounds can reveal noise. Raise it only when necessary. Modern cameras differ widely, so test your own body and housing setup on familiar dives rather than relying on a single online number.
Focus on the eye and control depth of field
The eye is the priority in almost every seahorse portrait. Make it sharp. Seahorse eyes are small, and their independent movement means the eye closest to the lens is usually the one to target for a simple portrait.
Single-point autofocus works well when there is enough contrast and the animal is reasonably still. Put the point directly over the nearest eye, focus, and shoot a short controlled sequence if water movement is rocking you both. Avoid spraying frames. A few well-timed shots give you more time to reassess the animal and your position.
Back-button focus can help photographers who want to separate focusing from the shutter release, but it takes practice before a dive trip. Try it first. If autofocus hunts on a patterned background, use a focus light, switch to a smaller focus point, or use manual focus with controlled forward-and-back body movement.
Keep the camera sensor as parallel as possible to the plane containing the eye and face when you want more of the head sharp. Parallel matters. For a side-on portrait, that may mean holding the port level with the animal rather than aiming down from above.
A diagonal composition can look more alive, but it usually reduces the usable sharp zone. Make that trade consciously. If you want only the eye sharp and the snout soft, open the aperture slightly and maintain exact eye focus; if you want the full head sharp, close down a little and square the camera to the subject.
Place strobes for natural texture
Seahorses have bony ridges, coronets, and fine skin texture that can look excellent under soft directional light or unpleasant under flat frontal flash. Start wide. Place strobes slightly behind the front of the port, angled outward so the edges of their beams illuminate the subject rather than blasting the water directly in front of the lens.
For a straightforward portrait, position each strobe about level with the port and a little above the lens line, then aim them inward toward the seahorse. Use low power. This reduces backscatter, keeps recycle times short, and gives you a better chance of catching a brief head turn.
On a silty site, pull strobes farther out to the sides and angle them more aggressively away from the lens axis. Watch the particles. If white dots fill the frame, changing strobe angle often helps more than changing exposure settings.
One strobe can create stronger shadow and mood, especially against a dark background. It is harder. Use it only when you can keep the light controlled and still maintain good buoyancy, because a dramatic setup is not worth a fin touch or a stressed subject.
Build a better composition without crowding
Take an initial record shot, then look for a cleaner angle. Small shifts matter. Move your body, not the animal, until a plain patch of water, distant reef, or evenly colored vegetation sits behind the head.
Give the seahorse room to face into the frame. This is simple. A little empty space in front of its snout usually feels more natural than placing the face against the image edge.
Look for background separation before you increase magnification. A busy frame can make even a perfectly focused seahorse disappear, while a modestly wider image with a clean blue, green, or dark background often has more impact. Distance between subject and background helps. You can improve blur by choosing an angle where the background is farther away rather than pushing your aperture wide open.
Include habitat when it tells an honest story. Seagrass, soft coral, and algae can show scale and camouflage, but inspect the edges of the frame for bright distractions and cut-off fragments. Keep it believable. A seahorse image does not need to look isolated in a studio to be successful.
Use a repeatable shot sequence
- Stop several feet away and assess current, bottom type, and the animal’s behavior. Pause first.
- Settle into a stable hover without touching reef, sand, or seagrass. Keep fins still.
- Take one wider frame to confirm exposure and strobe placement. Review quickly.
- Move only as close as your lens requires, while preserving the animal’s space and natural behavior. Stay calm.
- Focus on the nearest eye, wait for a good head angle, and take two or three deliberate frames. Then stop.
- Back away after a short encounter so other divers and the animal get space. Leave cleanly.
This sequence prevents the usual mistake of chasing magnification before you have exposure, focus, and buoyancy under control. Start wider. Cropping a sharp, respectful frame is usually better than forcing a closer shot in surge.
Common problems and practical fixes
If the eye is soft but the tail is sharp, your focus point probably landed on the wrong plane or your camera was angled too steeply. Recompose. Put the sensor closer to parallel with the face and aim the focus point at the nearest eye.
If the whole image looks soft, distinguish between focus error and motion blur. Check details. A smeared background and soft edges suggest camera movement or surge, while one sharp patch behind the eye suggests the autofocus chose the wrong target.
If the animal looks washed out, lower strobe power before closing the aperture or dropping shutter speed. Flash is likely the issue. If the subject is correctly lit but water behind it is too bright, increase shutter speed within sync limits or close the aperture a little.
If backscatter dominates, do not keep shooting and hope later frames improve. Reset. Widen strobe placement, angle beams away from the lens, and avoid finning over loose sediment.
FAQ
How close should I get to a seahorse?
Let the lens determine your distance, not a desire to fill every pixel. Keep space. If the seahorse turns away, shifts repeatedly, or appears unsettled, you are too close or have stayed too long. A longer macro lens, careful crop, or wider environmental composition is the better choice.
Should I use flash to photograph seahorses underwater?
Flash can reveal color and freeze fine detail, but it should be used sparingly and with low power. Be considerate. Take a limited number of frames, monitor behavior, and follow local guidance if a site restricts artificial light around marine life.
What aperture is best for seahorse macro photos?
Many photographers begin around f/11 to f/16 because it offers useful depth of field without demanding excessive strobe output. Start there. For a face angled toward the lens, f/16 to f/18 may help; for a soft-background profile, f/8 to f/13 can work if the nearest eye remains sharp.
Can I photograph seahorses with a compact camera?
Yes, provided it can focus close enough and you can control the camera steadily. Keep it simple. Use macro mode, get close only within the camera’s focus range, add an external strobe if appropriate for your setup, and prioritize eye focus and clean composition over tiny details.
Is a night dive better for seahorse photography?
Night dives can provide darker backgrounds and may make certain animals easier to locate, but they also add task loading and require comfortable night-diving skills. Know your limits. Practice camera handling in easier conditions first, and get guidance from a certified instructor if you are new to night diving or managing buoyancy with photography equipment.
The best seahorse photographs look calm because the dive was calm. Slow down. Set a workable exposure before the encounter, hold a stable hover, focus on the eye, and leave the animal behaving as you found it.
Related posts
This article is for general informational purposes only and is not dive training or medical advice. Always train with a certified instructor and consult a doctor before diving if you have any health concerns. Gear specs, pricing, site conditions, and operator schedules change, so verify current details directly with the manufacturer or dive operator.
Disclosure: This post may contain affiliate links. If you click through and make a purchase, we may earn a commission at no extra cost to you. We only recommend gear we’ve researched or genuinely believe in.